How to
Make Kehilalinks Pages
Links
Introduction
Links connect one web page to other web pages, to another place
within the same web page, and even to other kinds of digital
documents. In this lesson you will learn how to create links in a
web page and how to make a web site that contains more than one web
page.
Inserting Links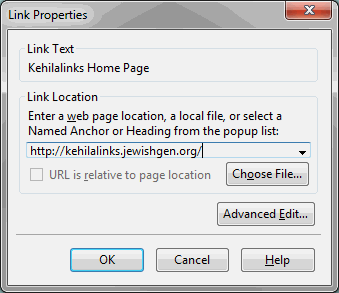
 The simplest way to insert a link is to
highlight some text and click on the "Link" button in the second
tool bar, or select
The simplest way to insert a link is to
highlight some text and click on the "Link" button in the second
tool bar, or select
Insert -> Link
either of which
will open the "Link Properties" window. In the "Link
Properties" window you will need to enter a URL ("Uniform Resource
Locator", sometimes referred to as a URI - "Uniform Resource
Identifier") -- i.e., a web address -- for the link. You can link to
a web page on the Internet, to another web page file that is part of
the same web site, or to another location within the same page. You
can also link to other types of files. We will cover each of these
types of links in the following sections.
Try making a link by opening a new blank page in Composer and typing
the text "Kehilalinks Home Page".
Next, select that text and click on the "Link" button. In the
area where it says "Link Location" type http://kehilalinks.jewishgen.org/, which some of
you might recognize as the URL of the Kehilalinks home page. After
you type this URL, click on the OK button. The text with the
link should now be in a different color and possibly underlined to
indicate that it is now a link. Try out the link by browsing the
page and clicking on the link. (You have to view the page in a
browser to be able to try it because Composer is not a browser and
does not follow links.)
To remove a link in Composer, highlight the text that has the
link (or just click someplace within it), click on the "Link"
button, and in the "Link Properties" window delete the text of the
URL (i.e., clear the link location field). Then click "OK" and the
link will be gone.
We will learn in a future lesson how to change the color of
links. Note that you can't simply use the Text Color tool to
change it.
 Adding Links on Images
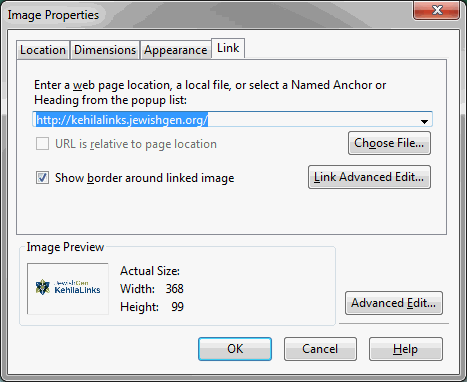
You can also add a link to an image. For example, let's say
that you want to add a link from the Kehilalinks logo on your page
to Kehilalinks. Click on the image in Composer and then click on
the "Link" button. The "Image Properties" window will open
up in the "Link" panel. Enter the Kehilalinks URL just like you
did in the "Link Properties" window when you added the link to
some text. Browse the page and try out the link.

Links on images is a common technique that web designers use to
make "buttons" and other clickable icons in their web pages. For
example, here's a "button" that has a link on it: 
Click on the button and see where it goes. (I promise it is
nowhere dangerous, unless you think Jewish genealogy is somehow
subversive.)
If your image doesn't already have a border, you can add a
2-pixel border to the image by clicking the "Show border around
linked image" box. Borders of images that have links have the same
color as text links.
Linking Within A
Web Site
To make a web site, as opposed to just one web page, you need to
create two or more web pages that are connected to each other by
links. Try this out by using Composer to make 2 web pages. Use the
file names "first.html" for the first page and "second.html" for the
second page (you can use any file names you want, but I'll refer to
them by these file names). In "first.html" add the text "This is a link to the second page".
In
"second.html" add the text "This
is a link to the first page". Save both files in the same folder.
Now go back and edit "first.html" in Composer. Select the text and
click on the "Link" button. Choose the file "second.html" as the
link location. If you saved the files in the same folder then your
link properties window should look like the the example shown here,
with the "URL is relative to page location" box automatically
checked. Note how the link location is just the file name, not
a full URL with "http://". That's how a URL should look for a link
to a file on the same web site. Browse "first.html" and try
out the link (you can't test links directly in Composer, remember,
so you have to use a browser).
Now open the file "second.html" in Composer and add a link to its
text, selecting as the link location the file "first.html". Browse
"second.html" and try out that link. Now you should be able to use
the links to move back and forth between the pages. Congratulations,
you just made a complete (albeit very, very simple) web site!
Be very
careful to make sure that the "URL is relative" box is checked
when you link to files on your own site. Don't make the
mistake of leaving it unchecked, which will cause the Link
Location to be something like file:///C:/Users/User1/Documents/test/second.html.
That URL will still work on your computer, but won't work when you
upload your site to Kehilalinks. If you ever see link locations
that start with "file:///" you know you left the box unchecked!
Relative vs.
Absolute URLs
Web pages that are on another server someplace in the Internet are
called remote web pages. When you make a link
from your web page to a remote web page you must use a complete URL,
such as "http://www.kehilalinks.jewishgen.org/". A complete
URL like this is called an absolute URL, because it
absolutely identifies the location of a web page no matter on what
web page or server the link is. Even if you move your web page
from one server to another (like from your home computer to the
Kehilalinks server, as we will do in lesson 6), the link will still
work because the absolute URL is still valid.
The practice web pages "first.html" and "second.html" that we just
made, however, are local web pages, not remote, because they are on
the same server as one another (your home computer, in this case, is
the server). To link to local pages we don't need or want to use
absolute URLs that contain "http://" because we don't have to go out
onto the Internet to fetch the pages. Instead, we use what are
called relative
URLs. A link location that consists of just a file name is
relative. It tells a web server to look for the linked file in the
same folder as the web page file that contains the link. If you move
your web site to another server, as long as you keep the files in
the same folder then the relative link will still work.
You must, however, use absolute URLs in links when you link to
someone else's web site on a different server, but it is an
excellent idea to use relative links when you are linking to other
web pages in your own site. As an example, consider the main class
page of this course, which has links to each of the lessons (that
I've posted so far). For these links I could use an absolute URL,
like "http://kehilalinks.jewishgen.org/class/Shtet1.html", but
instead I use a relative URL, "Shtet1.html". This means that I can
move my entire class site from my home computer, where I test the
pages, to the Kehilalinks server, and all the links between the
pages in the site will still work the same as they did on my
computer. If I used an absolute URL like
"http://kehilalinks.jewishgen.org/class/Shtet1.html", however, then
the links would not work when I was testing my pages on my home
computer because they'd always point to the Kehilalinks server. I'd
have to upload my pages each time I wanted to test the links.
So remember: Use absolute URLs (e.g., full
URLs starting with "http://") for links to other web sites. Use
relative URLs (e.g., just the file name) for links to other pages
on your own site. Don't ever use links that start with "file:///"
for any links because those will only work on your computer, not
on the web server that you will move your files to.
Organizing Web
Files into Folders (Optional)
So far I've asked you to put all of your html and image files into
the same folder. I did this to make it easy for you to use relative
URLs. But soon you may have a complex web site with a lot of
files and you may want to organize your files into different
folders. Frequently, for example, web page designers like to put all
their image files into one folder and their html files into another.
This can get
tricky and you don't have to do this -- you can keep putting all
of your files and folders in just one folder like we've been
doing and skip this (possibly very confusing) section entirely
-- but if you want to organize your files into different folders and
need to make relative links between the folders, this is how you do
it.
Let's say I organize my folders and files in the way that is shown
in the figure below. There's a root folder (the
highest folder than contains all the other folders) that contains an
index.html file. The index.html file is my "home page" -- the page
that I want people to look at first when they visit my site. The
home page has one image in it, "pic.jpg", and a link to another,
local page, "page.html", which also uses the image "pic.jpg".
In addition to the "index.html" file, the root folder also contains
two other folders: the folder "images", which contains the image
file "pic.jpg", and the folder "html", which contains the web page
file "page.html". The dotted lines in the figure are meant to show
that the "images" and "html" folders are sub-folders of the root
folder. The solid arrows represent the links from "index.html" to
"pic.jpg" and "page.html", and from "page.html" to "pic.jpg" and
back to "index.html". The text next to each solid arrow shows the
relative URLs for each of those links.
The relative URL in the link from index.html to page.html is html/page.html, which means
"the file 'page.html' contained in the folder 'html'". Similarly,
the relative URL in the link from index.html to "pic.jpg" is images/pic.jpg, which means
"the file 'pic.jpg' contained in the folder 'images'". Because the
links are relative, it is implicit that the "html" and "images"
folders are in the same folder as the index.html page.
To link back to the home page from page.html, I use something called
"dot notation" to indicate that I want to go up one folder. The
relative URL in this case is ../index.html
. The "dot dot" ("../") means "the parent folder above the current
folder", so this URL means "the file 'index.html' in the parent
folder above the current folder".
To link from page.html in the html folder to pic.jpg in the images
folder, I use the relative URL ../images/pic.jpg
, which means "the file 'pic.jpg' in the folder 'images', which is
in the parent folder above the current folder".
You can also use dot notation to move up 2 or more folders by using
more than one "../". For example, ../../
means "the parent folder above the parent folder above the current
folder".
Something else you might see is a single dot, "./". A single dot
means "the current folder". Thus, the relative URLs index.html and ./index.html mean the same
thing.
If you find all this talk of relative paths and folders and dot
notation to be confusing, don't worry. You can continue to put all
of your html and image files into just one folder and everything
will work just fine.
General Tips for
Organizing Your Site (Not Optional)
No matter how you organize your files, here are some things that you
should always do to make managing your site easier for you and for
the Kehilalinks web server administrator:
- Always
call your "home page" -- the first page that you want people
do look at -- "index.html" (or "index.htm") unless the
web server administrator tells you otherwise. This is a default
name that the web server will look for to load automatically.
Thus, for example, http://www.kehilalinks.jewishgen.org/Gorodenka/
and http://www.kehilalinks.jewishgen.org/Gorodenka/index.html
mean the same thing, because the Kehilalinks web server will
automatically load index.html as the default home page in the
Gorodenka folder.
- If you organize your site into multiple folders, as explained
in the previous section, always put your index.html (index.htm)
file in the root folder. The "root" is the
highest-level folder of your web site. All the other folders in
your web site will be sub-folders of the root folder.
- Use
relative links within your site. If you forget about
this and link to things within your site using absolute links,
your web site will probably work just fine when you look at it
on your computer, but when you upload your files and folders to
the web server then those links will be broken. It's easy to
find that mistake because a broken link will start with
"file:///". That is a very common error for beginning web
designers to make and I'll remind you about this when we start
uploading our sites in Lesson 6.
- When you upload your site to Kehilalinks (which, as I
mentioned, we'll do in lesson 6), remember to
upload all of the files and
folders of your site. If you forget to upload a file,
any links to it will be broken and, if it's an image file, there
will be a "hole" in the page where the image should be.
Deep Linking
You might have realized by now that an "Image Location", which you
specify when you insert an image, is also a URL. When you downloaded
the "box.gif" file in the last lesson and inserted it into your
practice page, you used the relative URL "box.gif", but you could
have used the absolute
URL"http://www.kehilalinks.jewishgen.org/class/box.gif" and your
page would have looked exactly the same without having to download
the image. Using an absolute URL to display an image on another web
site as if it is part of your web site saves you from having to copy
the image, but that's a type of "deep linking", which is something
to do only on rare occasions.
"Deep linking" is making a link that points to specific information
or a specific image on another web site out of context, so you show
only that information or image and nothing else from the web site
that holds that information. Such links are called deep links.
Deep links are in some sense "stealing" information because they
bypass all the hard work (and maybe the advertising that pays for
the site) of the creator of the other web site. For this reason,
deep linking is often considered to be, at best, a breech of
Internet etiquette, and sometimes leads to lawsuits.
For example, take a look at the image http://feefhs.org/maplibrary/austro-hungary/galicia.jpg.
This is a very nice old map of Galicia and I may want to link to
this map if my kehila is in Galicia. If I just link to that map
image, however, then I'm deep linking, because the image is actually
just a part of the web page at http://feefhs.org/maplibrary/austro-hungary/ah-galic.html.
If I deep link, you won't see that the map is actually part of the
FEEFHS web site and see any of the FEEFHS links or other material.
It is not generally considered to be deep linking if I link to the
page, even though that page is buried deep in the FEEFHS web site,
because it is clear that the page is part of the FEEFHS web site. As
a courtesy, however, I often provide a link to the home page of a
site to which I have deeper links. For example, I might do something
like this: Map
of Galicia from an 1882 atlas (On the FEEFHS web site).
Something to keep in mind
for later is that linking works both ways and someone else
may link to individual pages in your web site, too. This
means that visitors to your site won't always come in
through your home page. As you build your site, always have
a site title on each page that tells people where they are
and links that let them explore your site. We'll talk more
in future lessons about changing page titles and making it
easy to navigate your site.
|
Try doing some image deep linking (to practice for those times when
you have a good and permissible reason to make a deep link)
by adding our old friend  the green box image to a web page that you
  edit in Composer. This time,
however, don't download the green box to your computer but link to
the one you see here, using the image's full URL.
edit in Composer. This time,
however, don't download the green box to your computer but link to
the one you see here, using the image's full URL.
One way to find the full image URL in the SeaMonkey browser is to
right-click on the image and select "View Image". That will show you
just the image file. The URL for the image will be in the address
bar near the top of the window (it should be
"http://www.kehilalinks.jewishgen.org/class/box.gif"). In other
browsers (and this is an option even in SeaMonkey), right-click on
the image and select "Properties". That will open another window
that shows the URL of the image. For example, I've included here the
properties window from Internet Explorer.
Copy the full image file URL and use that as the image location when
you insert the image into your page. Note that the "URL is relative
to page location" box must be unchecked when you use an absolute URL. You'll
notice that when you type "http://" in a link location, Composer
knows that you are making an absolute link and automatically grays
out the "URL is relative to page location" so you can't check the
box.
Linking Within the
Same Page
So far, you've learned how to create links between web pages.
Now you will learn how to create links to different locations within
the same page. This feature is useful, for example, in
creating a table of contents for a long web page. You can have
a list of links at the front of the web page, each of which points
to a section farther down in the page. (After each of those
sections it is also a good idea to have a link back to the table of
contents. This is something that I think is a good idea although I
obviously did not do it in these lesson pages.) Of course, if
your document is so long that you need to link to different places
within it, it might be better to simply split it into more than one
page, but sometimes, for organizational reasons, you'll want to keep
a large document whole.
Establishing a link to a place within a document is a two-step
process: 1) Identify the location that will be linked to by
creating what is called a named anchor, or target, at
that spot, and 2) make a link to that named anchor.
Creating Named
Anchors
You can insert a named anchor (also called a target) into a page by
selecting 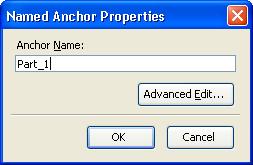
Insert -> Named Anchor...
which will open the "Named Anchor Properties" window. This is
a very simple window that asks for a name for the anchor. You
can use upper or lower case letters, numbers, or the "underscore"
character ('_') in an anchor name. (If you try to type a space,
Composer will automatically change the space to an
underscore.) I don't know what the upper limit is on the
length of an anchor name (256 characters, maybe) but, just as with
file names, I recommend choosing something short, meaningful, and
easy to remember and type.
 After typing the anchor name and clicking
on the "OK" button, Composer will display a small icon that shows
a black anchor on a yellow background (smaller than the one shown
here). This icon will appear only in Composer and will not
appear when a page is viewed in the browser. Try it out for
yourself.
After typing the anchor name and clicking
on the "OK" button, Composer will display a small icon that shows
a black anchor on a yellow background (smaller than the one shown
here). This icon will appear only in Composer and will not
appear when a page is viewed in the browser. Try it out for
yourself.
Linking to Named
Anchors
Try making links to named anchors by opening a new blank page in
Composer. Add a lot of lines of text to the file (it doesn't
matter what you type) so that the number of lines of text exceeds
the height of a browser window and you have to vertically scroll to
see the entire page (you can also do this 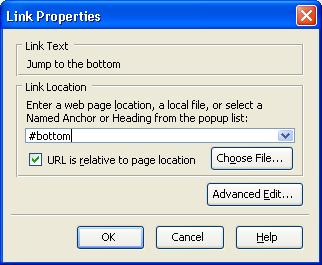 by typing only a few lines and then making your browser
window very short or by making the text really tall). After
entering the lines of text, click at the very top of the page and
insert a named anchor named "top," then click at the bottom of the
page and insert an anchor named "bottom."
by typing only a few lines and then making your browser
window very short or by making the text really tall). After
entering the lines of text, click at the very top of the page and
insert a named anchor named "top," then click at the bottom of the
page and insert an anchor named "bottom."
To make a link at the top of the file to the bottom, add the text "Jump to the bottom" at the
top of the file, select that text, and then click on the "Link" tool
button to open the "Link Properties" window. Notice how there is a
small, downward pointing arrow to the right of the space for the
link location? Click on that and you will see the options "#top" and
"#bottom". These are the named anchors that you just created a few
moments ago. Select "#bottom" and click "OK" to create the link.
Because the named anchor is in the same web page as the link, the
link location is relative so the "URL is relative to page location"
box will automatically be checked.
Browse the page and try clicking on the link that you just made.
Your browser should jump to the bottom of the page. Note that if
your web page already entirely fits in the window then you won't see
anything happen. If you don't see any change, try making the browser
window very short so that the entire page won't fit in the window
and then click on the link to the bottom of the page.
Now add the text "Jump to the top" to the bottom of the file, select
it, and add a link to the named anchor "#top". Browse the page and
you should be able to jump back and forth to the top and bottom of
the page just by clicking on the links instead of having to scroll.
Linking to Named
Anchors in Other Web Pages
Just as you can link to other web pages, you can also link to named
anchors within other web pages. To do this, you provide the normal
URL (either relative or absolute) followed immediately (i.e., no
spaces) by a pound sign ('#') and the name of the anchor. For
example, if your practice page "second.html" that you made earlier
this lesson had a named anchor called "bottom", you could make a
link to it from the "first.html" page with the URL
"second.html#bottom". Try this out for yourself by adding a "bottom"
anchor to "second.html" and a link to it from "first.html".
Named Anchors for
Headings
Composer 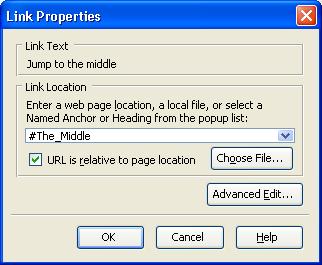 has a nice feature that automatically
creates named anchors for headings, so you can easily add links to
jump to different sections of a document. Add a new line with the
text "The Middle" in
the middle of your practice page and make that line a heading (any
heading number will work). At the top of the page add the text "Jump to the middle". Select
that text and click on the "Link" tool button to open the Link
Properties window, look at the list of named anchors and, in
addition to "#top" and "#bottom", you should now see an option
"#The_Middle". Choose that option and click "OK". Browse the page
and try out the link to the middle. Composer will automatically
create named anchors for every heading.
has a nice feature that automatically
creates named anchors for headings, so you can easily add links to
jump to different sections of a document. Add a new line with the
text "The Middle" in
the middle of your practice page and make that line a heading (any
heading number will work). At the top of the page add the text "Jump to the middle". Select
that text and click on the "Link" tool button to open the Link
Properties window, look at the list of named anchors and, in
addition to "#top" and "#bottom", you should now see an option
"#The_Middle". Choose that option and click "OK". Browse the page
and try out the link to the middle. Composer will automatically
create named anchors for every heading.
Table of Contents
Let's say you want to add a table of contents of headings to a
complex page that you've just created, but you don't want to take
the trouble to create a link to every heading. Or let's say that you
change the page frequently so updating it is a lot of trouble. If
only there was a way to automatically create a table of contents and
update it in one stroke when the page changes so it wasn't so much
work.
Ta-da, there is! Composer has a feature to create, update, and
delete tables of contents. I used it to create the table of contents
in the Introduction section of this
document. You can insert a table of contents using "Insert ->
Table of Contents -> Insert". This will insert a table
of contents wherever the cursor happens to be, and will also
automatically create specially-named anchors for every heading. The
reason why Composer creates these specially-named anchors is so
that, if you update or remove the table of contents, Composer knows
which anchors it created and can delete them.
Note that you can only create one table of contents in a page. Also
note also that Composer will only create a table of contents listing
for Headings.
This is why I mentioned in
lesson 2 that you should only use the "Heading" paragraph styles
for things that are real headings, not just as an easy way of
making a font bigger. If you mistakenly used a Heading style for
some text then it will appear in the table of contents.
Similarly, if there is something that you want to have included in
the table of contents, you can't simply increase the size of the
font to make it look like a heading. You have to use an actual
Heading paragraph style.
If you change your page and add or delete headings, and you want to
update your table of contents, simply use "Insert -> Table of Contents
-> Update". If you want to move the table of
contents to another location in your page, don't
delete it directly, but use "Insert -> Table of Contents
-> Remove" to delete the old one and then insert it
someplace else using "Insert -> Table of Contents ->
Insert". If you always use this tool for adding, updating,
and removing tables of contents then the specially-named anchors
will always be handled correctly.
Sometimes when you add, delete, or rearrange headings, Composer
might get confused and not update the table of contents correctly.
In this case, simply remove and then re-insert the table of contents
to get Composer back on track. Also, when the only change to a
document is to update the Table of Contents, but you make no other
change, sometimes Composer doesn't recognize that a change was made,
so it won't allow you to "Save" and "Browse" the changed page. In
that case, simply type a space someplace and immediately delete the
space. That will "wake up" Composer without changing your page, so
you can then save and browse the page.
One drawback to using tables of contents is that the specially-named
anchors take the place of the named anchors that the headings
originally had. If you use a table of contents in your page but also
want to have other links to jump to specific headings, you'll have
to add your own named anchors.
References or
End-notes
Unlike with tables of contents, Composer does not have an easy way
to make a linked list of references or end-notes, but you can make
it yourself using named anchors. To see one way to do it, take a
look at any Wikipedia page. For example, here's the page for Kiev: https://en.wikipedia.org/wiki/Kiev.
Do you see the reference numbers, which are superscripted numbers in
brackets (e.g., [2] ). Click on a reference number and
you will jump to the list of references at the end of the page. Now,
do you see the up-arrow ("^") in each reference, possibly followed
by "a, b, c, d"? It looks like this: ^ a b c d. (If
a references is used only once, it has only the up-arrow. The
letters indicate that the reference is used several times in the
text.) Click on the "a", and you'll jump back to the place where you
started. The links that go from the reference numbers in the text
down to the references, and from the references back to the text,
are implemented using named anchors. They let you refer to a
reference without losing your place in the long page.
Opening Links in
Other Windows
Click on this link to the JewishGen home page: JewishGen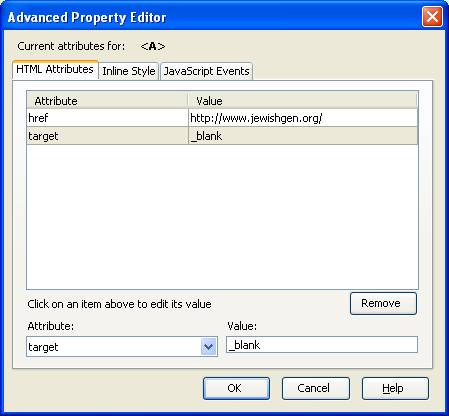
Now click on this link to the JewishGen home page: JewishGen
Did you notice a difference? The first link opened the JewishGen
home page in the same window as the lesson, but the second link
opened JewishGen in a second window (or it might be another tab,
depending on your browser and its settings). Here's how you modify
links in Composer to do that:
- In the "Link Properties" window for a link, click on the
"Advanced Edit" button. This opens the "Advanced Property
Editor" window.
- In the "HTML Attributes" tab of the "Advanced Property
Editor" window, in the Attribute drop-down list in the lower
left corner, select "target".
- In the Value area, select "_blank" (in older versions of
Composer, you'll have to type "_blank" without the quotes).
- Click on the OK button to save the target attribute. The link
will now open in a new window (or tab).
I generally open new pages when a link goes to another site, so that
someone can keep in the same place in my site while looking at the
other site. But I usually open links on my own site in the same
window (because if I opened a new window for every page in my site,
people would quickly get annoyed because they'd have to close all
those darn windows).
Opening Image Links
in Other Windows
If you have a link on an image and want to have that link open in
another window, in Composer, double-click on the image to open the
Image Properties window, click on the "Link" tab, then click on the
"Link Advanced Edit" button. That will open an "Advanced Property
Editor" window for the link.
Other Types of
Links
There are other types of links, not just links to web pages or
images.
Email Links
Try this: Open a practice web page in Composer and type the text "Send me email." Then
select that text and click on the "Link" button. For the URL,
type mailto:
(note the colon) followed immediately (no spaces) by your email
address (for example, mailto:user@mail.com). Notice how we
are using "mailto:" instead of "http://"? Save the page.
Now open the
page in a different browser, NOT SeaMonkey, click on the link in
the browser window and, if your computer and browser are configured
correctly, it should open your email client (or, at least, ask you
if you want to open the email client). The "To:" address in
the email client window will be whatever email address you typed
after "mailto:". (We can't use SeaMonkey to test the "mailto"
link because SeaMonkey, if you installed the entire SeaMonkey suite,
includes its own email client and you probably haven't configured
that.)
Note that if you don't have an email client installed in your
computer, or if your web browser is not configured to automatically
open an email client, this might not work when you try out the link.
There are a lot
of people who either don't have an email client installed on their
system or else their web browser is not configured to open the
email client program (this is often done for security reasons).
Remember that we should strive to make our web pages as compatible
as possible with all different browsers and computer configurations. For email
addresses in web pages, be sure to include the text email
address (for example, literally include the text "user@mail.com"
in the page in addition to having the "mailto:user@mail.com"
link). That way people whose browsers won't
automatically open an email client when they click on the link will
still be able to know what your email address is.
Email links can also include lists of email addresses, carbon-copy
("cc") and blind carbon-copy ("bcc") recipients, and even subjects.
Try out each of these links below to see what they do (but don't
actually send the emails!). Note that if you click on the example
mailto links and an email client program does not automatically
start up, that means your computer or browser is not configured with
an email client and you will not be able to try out the mailto
links. You can put one in your page for others to use, but you
should ask someone else to check that link for you to make sure it
works.
- To have a list of email recipients, use commas between each
email address. For example,
mailto:user1@mail.com, user2@mail.com.
- To add a carbon copy recipient, follow the last of the mailto
recipients with a question mark "?" and "cc=" , as follows:
mailto:user1@mail.com?cc=user2@mail.com
- To add a blind carbon copy recipient, use "bcc" instead of
"cc":
mailto:user1@mail.com?bcc=user2@mail.com
- To add a subject, use "subject" instead of "cc" or "bcc":
mailto:user1@mail.com?subject=This
is a test
- To use cc, bcc, and subject all together, use the ampersand
("&") between each of them:
mailto:user1@mail.com,
user2@mail.com?cc=user3@mail.com&bcc=user4@mail.com&subject=This
is a test
Links to Other
File Types
You can add links on your page to text files, image files, PDF
files, Word documents... to any other kind of file. If your browser
recognizes the file type and on your computer you have the right
program to open that file, your browser will either automatically
open the file (this could be a big security problem for some types
of files, so I don't recommend that you open just any file in
someone's web page just because they gave you a link to it!) or
prompt you whether to open the file or save it.
For example, here is a
link to a PDF file that I put in the course folder on the
Kehilalinks server. Click on the link and see what happens. Does the
file automatically open in the browser? Does it open in a separate
Adobe Acrobat Reader window? Do you get prompted to open or save it?
These are all possibilities, depending on the browser and how it is
configured. Try it in different browsers to see if there are
differences between the browsers on your computer.
Try it out for yourself with other types of files, like Word
documents, text files, images, and even video files if you have
them. Put the
files in the same
folder as your web page and make relative links to them.
Browse the page and click on the links to see what happens. Try it
out in different browsers to see if they handle the links
differently.
Here's something to think about, however: What happens if you make a
link to a type of file that someone doesn't have the right program
to open? For example, not everyone has Microsoft Office, so what
happens if you put a Word document on your web site? People may be
able to download the file, but they won't necessarily be able to use
it. For this reason it is a good idea to make links only to standard
types of files, like PDF files, that just about everyone has the
ability to use.
Converting Other
File Types to Web Pages
If you aren't sure that someone will be able to open a file that you
put on your site, you can try to convert the file to a web page. For
example, it is possible to convert Word documents, Excel
spreadsheets, and PDF files to web pages, although you won't be able
to edit the resulting web pages in Composer.
Saving Word
Documents as Web Pages
Microsoft Word has a feature that allows you to save Word
documents as web pages. Earlier, I warned you against doing this
in the class because the resulting web page files are not editable
in Composer, but you can use this method if you simply want to
convert an existing document to put on your site and won't want to
edit it in Composer. Convert a Word document to a web page and add
it to your site by following these steps:
- With the document open in Word, save the document as a web
page using
the type "Web Page, Filtered (*.htm;*.html)".
(The "Filtered" web page type removes a lot of the
Microsoft-specific html commands that usually bloat Word
documents saved as web pages, so I prefer that to the unfiltered
variety.)
- The saved web page will consist of two parts: a web page
file with the ".htm" extension and, if there were any images
or clip art in the Word document, a corresponding folder that
contains the images. The folder will have the same name as the
web page (without the ".htm") plus "_files". For example, if I
had a Word document called test.docx and saved it using the
file type "Web Page, Filtered (*.htm;*.html)", I would get a
web page file called "test.htm" and, if there were any images
in test.docx, a folder called "test_files".
- Put the new web page (and folder, if there is one) in the same
folder as your index.html page.
- Make a relative link (i.e., check the "URL is relative" box)
from your index.html page to the Word document web page.
Again, don't try to edit the Word document web page in Composer
because Composer won't recognize the Microsoft commands.
Note that the new web page won't have a link back to your home page
unless you have a link in the original .docx document. It might be a
good idea to have the link in your index.html page open the new
document page in a separate window. That way you people won't need a
back link and they can just close the separate window when they are
done with the document page.
Saving Excel
Spreadsheets as Web Pages
Excel has a web page conversion feature similar to Word. A nice
thing about converting Excel spreadsheets to web pages is that you
can convert an entire workbook, where each worksheet will be on its
own web page, in one step. (You can also create a web page for just
one worksheet, or even for just a selection within one worksheet.)
See this page on the Raducaneni
Kehilalinks site for an example:
Do you see the tabs along the bottom of the page? Each of those tabs
represents a worksheet in the original Excel file. The steps to
follow to convert an Excel file to web pages are similar to the
steps for Word documents:
- In Excel, save the spreadsheet using the file type "Web Page
(*.htm;*.html)". DO NOT use the "Single File Web Page (*.mht;*.mhtml)"
type, which will create a page only usable in Internet
Explorer.
- The saved spreadsheet/web page will consist of two parts: a
web page file with the ".htm" extension and a corresponding
folder that has the same name as the web page (without the
".htm" extension) plus "_files". For example, if I saved a
spreadsheet named "Book1.xlsx" using the "Web Page
(*.htm;*.html)" type, it would create a web page file
"Book1.htm" and a folder "Book1_files".
- Put the new web page and folder in the same folder as your
index.html page.
- Make a relative link from the index.html page to the web page
created by Excel.
As with web pages created by Word, don't try to edit the Excel web
page in Composer. You should also have the link to the Excel-created
page open in a different window.
Because you can't edit the converted spreadsheet in Composer, be
sure to pre-insert images and links directly in the spreadsheet file
before you save it as a web page.
Converting PDF
Files to Web Pages
Try one of the tools
listed here to convert a PDF file to a web page: http://webdesign.about.com/od/pdf/tp/tools-for-converting-pdf-to-html.htm.
Some of these tools are free and some are on-line. As with Word
documents and Excel files, the converted file will consist of a
web page and a folder. Copy both the web page and the folder to
the folder where your index.html page is and make a relative link
from the index.html page to the converted PDF file web page.
Remember, you likely won't be able to edit the converted PDF file
web page in Composer.
Permalinks and
Embedded Objects
Some web sites want and encourage you to link to material on their
sites. The New
York Times web site, for example, offers many ways to "share"
articles. One of them is a "permalink", which is a URL that will
link to the article even after the article becomes part of the New
York Times archive. YouTube, too, provides URLs to their
video pages, plus HTML code to "embed" a video in a page. We'll talk
about adding embedded objects in a future lesson.
Copying URLs
When you find a web page that you'd like to link to, you can copy
the URL from the address shown in the navigation toolbar of your
(SeaMonkey) web browser and paste the URL into the Link Properties
window in Composer. Or, if you find a link to a site that you like,
instead of navigating to the site, you can simply right-click in
your SeaMonkey browser on the link and select "Copy Link
Location" (other browsers have a similar feature), then
paste it into the Link Properties window. Practice both of these
methods using this link to the JewishGen-erosity
page on JewishGen. Add a link to the
JewishGen-erosity page from your practice page.
Finding Useful
Links for your Kehilalinks Site
At a minimum, Kehilalinks policy requires you to link to the
Kehilalinks home page and to the JewishGen home page. These are a
given. You'll probably also want to link to the web site of the
special interest group (SIG) that covers the region where your
kehila is. Also consider adding links to other Kehilalinks sites for
kehilas near yours.
A simple web search using a search engine like Google will probably
turn up many more likely sites to link to.
Links to JewishGen
Databases
JewishGen has many other links that you can add to your site,
including the JewishGen database for the region where your kehila
is, the Yizkor Book Project page for your kehila (if there is one),
the JewishGen locality page, and many others. Some JewishGen
databases lead to others. Try using the JewishGen
Communities Database to get the link to the locality page for
your kehila, for example.
Note that you can't simply search for your town in the Communities
Database and use the URL of the search results as a link. The
JewishGen Communities Database search results page gives you a list
of town names that match what you searched for, but the original
search term (the town name) is not included in the URL of the
results page. For example, try searching the JewishGen
Communities Database for the town of "Velikiye Komyati".
The URL of the search results page will be
"http://data.jewishgen.org/wconnect/wc.dll?jg~jgsys~jgcd". Note that
there is nothing in that URL that identifies the town. If you search
for other towns, the results page will always have the same 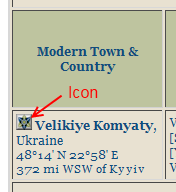 URL.
Similarly, you can't link directly to JewishGen Family Finder --
JGFF -- search results, which always have the URL
"http://data.jewishgen.org/wconnect/wc.dll?jg~jgsys~jgff~C". In that
URL, too, there is no indication of the name of the town.
URL.
Similarly, you can't link directly to JewishGen Family Finder --
JGFF -- search results, which always have the URL
"http://data.jewishgen.org/wconnect/wc.dll?jg~jgsys~jgff~C". In that
URL, too, there is no indication of the name of the town.
Instead of linking to the Communities Database search results page,
you must link to the locality page for the town. For every town
listed in the search results, there's a small icon next to the town
name. Click on the icon next to the town name "Velikiye Komyaty" to
go to the locality page for that town, which has the URL "https://www.jewishgen.org/Communities/community.php?usbgn=-1057693"
The number 1057693 identifies the town in the JewishGen database.
Now this is a link
that you can use in your page!
So, to make a long story short, always look for a town name or
number or map coordinates in any database URL from JewishGen that
you want to use in a link on your page. If the town name or number
or map coordinates are not there, the link won't do what you want it
to.
You might notice
that the locality page for your kehila has links to the JGFF and
Resource Map, and that those links have unique identifiers that
could be used in your web page. You might be tempted to copy those
links and put them in your page. But, before you go ahead and put
links to the JGFF and JewishGen Resource Map in your page, ask
yourself, "why?". JewishGen has already conveniently put those
links in one place, the locality page, and it's guaranteed that
those links will be updated if the site ever changes. Why not just
put the one link to the locality page, plus some text that says
"you can find here a link to the Family Finder and to the
JewishGen Resource Map"? Then you'd only have to update one link
if JewishGen changes things in the future.
Links to Other Web
Sites
Search the web using Google or another search engine to find more
web sites to link to. Not every site that has the name of your
kehila in it is worth linking to, but you never know what you'll
find until you look. Be sure to search using each of the different
variations of the kehila name. Avoid deep linking, whenever
possible.
Adding Family
Trees to Your Site
When you create a web site related to genealogy, a natural type of
data to want to add to your site is family trees. You can do this
using your family tree software and Composer.
But first, let me caution you to avoid showing information about any
living persons on your tree. Giving out birth dates and mother's
maiden names, especially, might have unintended consequences for
privacy and security. Family Tree Maker (FTM), for example, has a
"privatize" feature for exporting data. Most other family tree
programs on Macs and Windows have a similar feature, or you could
use a Windows program like GED2go (http://ged2go.weebly.com).
GED2go takes a GEDCOM file as input and removes all data about
living people. (GEDCOM is a genealogical standard file format that
all genealogy programs can import data from and export data to.)
Many family tree programs can export data, including trees, in a PDF
file. Some can even export data in the form of images and web pages.
On Macs, for example, Reunion and MacFamilyTree (at least I'm told)
can generate HTML files. I don't know, however, if they can generate
graphical family trees. On Windows, I know that FTM 2010 cannot
export to web pages, although it can export trees as images. The
problem with exporting trees as images is that the images can be
very large (in dimensions, if not in file size), which makes it
difficult to navigate them. But, in a pinch, you can insert the
images into web pages on your site. (I don't know if later versions
of FTM can export data as web pages.)
If your family tree program doesn't export data in HTML, you can
export to GEDCOM (don't forget to "privatize") and then use another
program to convert the data to HTML. These Windows programs, for
example (sorry Mac users), will take a GEDCOM file as input and
generate a family of web pages. Some will even generate graphical
trees.
Remember, with GEDmill and the other programs, you need to follow
several steps:
- Export the data from your family tree program in a GEDCOM file
(make sure to privatize!)
- Build the family tree web pages using GEDmill (or another
program)
- Create a link that opens in another window from your
site to the first page of the family tree pages
Note that there
will be no link back from the family tree pages to your home page,
so be sure to open the link to the family tree pages in another
window.
Assignment
This is a major assignment that could take you some time. When you
complete this assignment, you will have created a simple Kehilalinks
site.
First, add links to your kehila page. At a minimum, add these links:
- JewishGen
- Kehilalinks
- The web site of the SIG that covers the region that your
kehila is in (e.g., the Ukraine SIG)
- The JewishGen database for that region (e.g., the "JewishGen
Ukraine Database")
- The JewishGen locality page for your kehila
- A "mailto:" link so people can contact you (don't forget to
put your email address in text as well as the link)
- A "JewishGen-erosity" link
Next, add a second page to your web site and put any pictures that
you have on that page. Be sure to have a link from your home page to the picture
page and a link on the picture page back to the home page.
Also add links to whatever relevant web sites that you can find
through a web search. Don't agonize over finding and adding every
possible link at once. Add a few and, over time, you'll be able to
find and add more. Rome wasn't built in a day and your kehila web
site will take a while, too. With even a few links, however, your
web site will be of use to other researchers for whom you've already
identified other relevant sites, so don't worry about "finishing"
your site before you upload it to Kehilalinks in Lesson 6.
You can see what I've done with my Kamen Kashirskiy site by
following this link here: kc-4.html.
I put links on the text in the rectangles along the left side of the
page. There are links to the JewishGen and Kehilalinks home pages
and to the other pages in my site. Not only did I add a "pictures"
page, I added a "maps" page for good measure. On the home page and
on the maps page I put links to other sites that I found in about
half an hour using Google (and JewishGen).
Copyright © 2009, 2010, 2012, 2013, 2014, 2016 Mark
Heckman. All rights reserved.