 |
|
Now that we have made a (very, very simple) web page, we want to
save it. To do this, in Composer select "File ->
Save". Before saving the file, Composer first asks us to
give the page a title. The web page title is what is shown in the
title line of a browser window (usually at the top of the window)
when you open the page, and it is also used by web search engines.
Call your page "I just made a web page!", or something else that
reflects how triumphant you feel at this point. Then click "OK".
Don't worry if you can't think of a good page title; you can
always change it later (we'll talk about how to do that in an
upcoming lesson).
Composer then asks us where to save the file and to choose a file
name. Choose a name for the file, such as "example1.html". I'll be
referring to this file by the name "example1.html" from now on so
it might be easiest if you use the same name for your file.
Whichever name you choose, use only letters or numbers in the file
name; DO NOT use
any spaces or special (e.g., punctuation, except for the period)
characters in the file name. I must repeat: DO NOT use any
spaces or special characters in the file name.
Although the newer versions of Windows and Macs and the web
browsers that run on them can use file names that contain special
characters and spaces, not every operating system can. For
example, while "example1" is a good file name for a web page, "example
#1" is not, because it contains a space and a special character
(the "#"). You should also try to keep the file name
fairly short (because it makes the name easier to type). I
also usually prefer to make the name all lower-case to make it
easier to manage my web site (for reasons we will discuss in a
later lesson about links), but that is not a requirement.
Be sure the file name has the ".html" (or ".htm"; they are
equivalent) file name extension. Web pages are actually text files
written in a language called "HTML". Web browsers sometimes depend
on seeing this extension to know how to display the page. If
you save the file without a ".html" (or ".htm") extension, web
browsers won't necessarily display the file as you intend it to
look. They may treat the HTML commands as regular text so you
would see all the HTML commands in your web browser and not the
web page you were expecting.
The method of saving a file should be exactly the same as the
method you use for saving files in Microsoft Word, WordPerfect, or
other word processing program, so I won't need to say more about
that. Just be sure to save the example1.html file in a folder or
on the desktop where you can easily find it again. I suggest
keeping all of your work in this class in a folder that you only
use for the class, so you can easily find your work again.

Windows is configured by default to "hide extensions for known
file types". This means that, when you look in a folder at a file
name, the entire file name may not be shown. For example, even
though you may have given your example1.html file the name
"example1.html", it will only show in a folder as "example1". If
you right click on the file and select "Properties", then click on
the "Details" tab, you will see the full file name. A common mistake
is to add an extra ".html" to the file name, because you can't
see the original one, making the real file name
"example1.html.html"! Later on in the class, when
we create links to different pages, it will be important to know
the real name of the files, so it is good to become familiar now
with how file naming works on your computer. Be sure to get rid of
the extra ".html" if it's there.
I recommend un-hiding extensions for known file types. You'll
find that that will make things a lot less confusing for you. To
do this, in the Control Panel:
In order to see the "Folder Options" icon in the Control Panel,
depending on your version of Windows, you might first need to
change your Control Panel view to "Small Icons" (Windows 7), or
"Classic View" (Vista). In Windows 10, you can reach the Control
Panel by typing "Control Panel" in the "Search Windows box. (You
are on your own if you still use Windows 8.)
Although Composer is a "WYSIWYG" (What-You-See-Is-What-You-Get) editor, there are situations where what you see in the Composer window is not exactly the way that the web page will look in a web browser. A simple way to see what your web page will (probably) look like in the SeaMonkey browser is to click on the "Preview" tab at the bottom of the window.

We will use the "Normal" tab for most of our editing (because it
shows some things that are invisible when using the "Preview"
tab), but you can edit your text in Preview mode, too.
Preview mode gives a pretty good idea of how your page will look
in the SeaMonkey browser, but it isn't perfect. To really know how
your web page will look in the browser, you need to look at it in
the browser. To see how the SeaMonkey web browser displays your
web page, click on the "Browse" icon in the Composer toolbar near
the top of the Composer window (between the "Publish" and "Print"
icons). This will open a new browser window that will
display your web page. If you have made a change to the web
page, but have not saved the file before you browse the page,
Composer will ask you if you want to save the file first. It is a
good idea to frequently save your work to avoid losing it in case
of a computer crash, software crash, or user crash.
Note that
version 2.1 and up of SeaMonkey introduced a bug (at least on
PCs; I don't know about Macs) so that the "Browse" button is
disabled when you create a new page, even after you save the
file. To enable the Browse button, click on any of the tabs at
the bottom of the window (e.g., "Preview") first. That will
enable the "Browse" button. Then in Composer you can click back
on Normal to resume editing.
Believe it or not, although HTML is an international standard, different
browsers may display the same page differently! For
example, your page may look good when you view it in Firefox but
not in Safari. It is a good idea to also look at your pages in web
browsers other than SeaMonkey. Mac users by default have Safari,
Windows users have Internet Explorer (or Edge), and there's also
Google Chrome and Opera, which work on both Windows and Macs,
among others. (SeaMonkey is, under the hood, essentially the same
as Firefox, so I don't expect there to be any differences in the
way that Firefox and SeaMonkey display pages. Please let me know
if you find some differences.)
To view your page in another browser, you must first open a
window of the other browser and then "Find" your page. Every
browser, like SeaMonkey, has the ability to open specific files on
your computer, as well as on the web. In SeaMonkey, for example,
you click on "File -> Open File", then
browse to the file (which means you have to know where the file is
on your computer). In older versions of Internet Explorer, by
contrast, it's "File -> Open" (if the menu toolbar that
contains "File" isn't showing, click on "Tools -> Toolbars" and
put a check by the "Menu Bar").
In Firefox, if the menu bar is showing, you use "File -> Open
File". If you only have a Firefox button in the upper-left corner
of the window instead of the File, Edit, etc., menus, right-click
on an empty area of the tab strip near the top of the window and
check "Menu Bar" in the pop-up menu.
In IE 11, it is very similar to Firefox. The only difference is
that you use "File -> Open". As with Firefox, if the File menu
is not showing, right-click on an empty area of the tab strip near
the top of the window and check "Menu Bar" in the pop-up menu.
There may be slight variations in other browsers, but it will
always be basically the same idea. (Except for Edge; I honestly
have no idea how to open a file on my computer from within Edge
itself.)
Be very careful that, when you open your pages in browsers
other than SeaMonkey, don't accidentally save
the file from the other browser. That
could add extra HTML commands that would confuse Composer (and
confuse you, because you wouldn't know why Composer suddenly
doesn't do what you expect it to do). Only save your web pages
from inside Composer and you will (usually) avoid this problem.
You probably now have three windows open: the original SeaMonkey
browser window, the Composer window, and the new browser window,
and your screen may seem cluttered. Go ahead and close the
original browser window by selecting in that window
File -> Close (might also be "Close Window", if you have
multiple tabs open)
Be careful to not select
File -> Exit
which will completely exit SeaMonkey, closing all the windows,
including Composer, at once!
To add text to your document, you can either type it directly into Composer, as you've been doing, or you can copy and paste text from other web pages and documents.
Under the Edit menu you might have noticed that there are two
kinds of paste: "Paste" (<CTRL>+V), and "Paste Without
Formatting" (<CTRL>+SHIFT+V). Very often, you will want to
copy and paste text that you find in other web pages or documents.
This text is formatted (e.g., using HTML or other commands), and
if you use the regular "Paste" command then you will also copy all
of the original formatting. That would be fine, except that you
didn't use Composer to insert the formatting commands and Composer
might get all mixed up when you want to change the formatting. It
is much, much better to always use the
"Paste Without Formatting" command when you copy and paste
text into Composer.
Note that
even "Paste Without Formatting" doesn't help if you copy and
paste text from a Microsoft Word document. The copied text will
still contain a lot of extraneous commands that will confuse
Composer (and you, when you start editing). To copy and paste
material from a Word document, first save the ".doc" (or
".docx") file as a text file, then open the text file in a text
editor, like Windows "Notepad" program, then copy the text from
the text file. Under
no circumstances should you copy anything directly from a
document opened using Word.
Right now, the example1.html web page has the single sentence "I am looking
forward to making terrific web pages for Kehilalinks."
Move
the cursor to the end of the sentence and backspace to erase the
period. Then continue typing this: "now that I know
how to use the Composer. I thought that it would be
difficult but now I see how easy it can be, thanks to the
Kehilalinks Web Class. " (I'm intentionally having you
type a very long sentence, so we can see how Composer handles text
wrapping.)
Unless you are using a very wide Composer window, the text should
have wrapped onto a second line. If the text still fits on
one line, make the Composer window narrower so that the text wraps
to a second line.
[You can adjust the width of a window either by clicking on one
corner or side and dragging the edge inward, or, if you have the
window at full-screen size and cannot see the corners, by first
reducing the size of the window (in Windows, by clicking on the
middle icon at the top right hand corner of the window; MacOS has
a similar feature) and then dragging a corner or side.]
Notice that Composer automatically wrapped the text to fit the width of the window (either as you were typing or when you resized the window).
See how the web page looks in the browser by clicking on
"Browse". The browser will automatically wrap the text to
fit the width of its window, too. HTML is a "markup
language" that only describes the content of a web page, but not
its precise layout. This is one example why it does not
specify the precise layout: different people have different size
monitors and use different size windows, so browsers should be
free to adjust the page layout to fit the size of the window.
You can close the browser window, if you'd like, by selecting in
that window
File -> Close (or "Close
Window")
What we did when we pressed the "enter" key was insert a "line
break." For things that are in the same paragraph, you
generally want to avoid inserting line breaks so that the text
will automatically adjust to different size windows. A frequent
mistake made by people starting out with a WYSIWYG editors
like Composer is to use line breaks and spaces or tabs to make
the text line up the way they want it to, but they forget that
that won't work if you change the size of the browser window!
Don't do that! Frequently viewing your page in different
size browser windows will help you find where you have made the
mistake of pressing the "enter" key when you shouldn't have.
Remember, no matter how strong the temptation, don't use line breaks and spaces and tabs to make text line up. We'll learn a more reliable method of doing that later in the course. If you do it now then, when you get closer to finishing your page, you'll suddenly notice that things no longer line up when you change the window size and it will be hard to strip out all of the extra spaces and tabs and line breaks.
Go back to the Composer window and move the cursor to after "...learn more." Then press the "enter" key twice and type "Now we are learning about paragraphs." You should have a blank line between the original text and the new text.
Basic HTML does not have a standard for indenting paragraphs;
typically, paragraphs are denoted using extra space. We can denote
paragraphs by inserting an extra line break, as we just did, or by
using the "paragraph format" tool, which we'll learn about
shortly.
Although Composer offers you a choice of possibly dozens of fonts
or more -- whatever is installed on your computer -- I
recommend that you don't use most of them. The reason
for this is that not every computer has the same set of fonts.
Windows and Mac systems have different sets of fonts, for example,
and different applications may install additional fonts. If
you select a font that someone else's computer doesn't have, what
that person sees on their screen will be different from what you
see. For example, on my computer I have a font called "Gyparody".
It is a font intended to look like the font used on the TV
"Jeopardy" game show title. It looks like this:

This entire paragraph is
written in the "Gyparody" font. If you don't have the Gyparody
font on your computer then this paragraph will probably look
like all the other text. Lots of beginning web page makers make
this mistake, using fonts that only they have, but you will
always be safe if you use the three standard fonts.
There are three basic fonts that are built into SeaMonkey and
virtually all other browsers: Times (a variable width serif font),
Arial (also called Helvetica, a variable
width sans serif font), and Courier (a fixed width, serif
font). If you use these fonts then chances are very
good that other people looking at your page will see on their
computers what you see on yours. If you use anything else,
chances are that at least some people will see something different
(probably the default font -- usually Times or Courier, depending
on whether the font is variable or fixed width -- will be
used).
Whatever you do, absolutely
DO NOT use a picture font like "Zapf Dingbats" or "Wingdings"!
While an unusual character font might not appear on someone else's
computer as you intended, at least it will appear as
characters. The "picture" fonts, although they might draw
cute pictures when displayed on your computer, will display as
letters on other computers, which will really confuse things..
Practice changing fonts by changing the font of various words in
your example1.html file.
| Jewishgen Web Site Standard Colors |
||
| HTML Color String |
Color |
Where
used |
| #BEC49F | Light green | menu bar background, tables bgcolor & footer |
| #949C51 | Dark green | menu bar buttons, table header, text hover |
| #646C24 | Darkest green | menu bar buttons down |
| #E8E1D1 | Grey | footer background, table cell alternate |
| #134B7D | Blue | text |
| #C9D2D7 | Light blue | body background - sides |
| #505527 | Very dark green | H2, H3... |
| #063358 | Very dark blue | text |
| #092E27 | Blue-green overlay | logo overlap |
To apply a format to a
paragraph, begin from the Composer window:
1. Click to place the insertion point
where you want the format to begin, or select the text you want
to format.
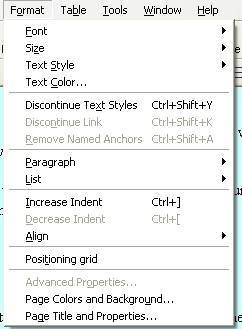
2. Choose a paragraph format using the
drop-down list in the Format toolbar:
2
3The text in headings is treated as special by browsers, to make
headings distinct from normal text. Typically, headings are
automatically boldfaced and otherwise displayed differently than
the normal text (although the precise way that a browser should
display headings is not defined by the HTML standard and may
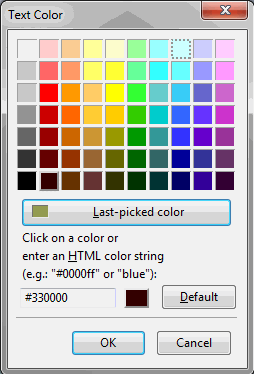
differ between browsers). The boldface and other changes are
automatic, but you can also use different fonts, colors,
alignments, and styles in headings.
In general, the higher the heading style number, the smaller the
size, so that Heading style1 is the largest and Heading style 6 is
the smallest. For example, the heading for this section, "Heading
Styles", uses Heading 3 style. The heading "Introduction" at the
beginning of this lesson uses Heading 1 style.
Don't make the mistake of using a
Heading style when all you really want is to increase the
size of some text. That's what the font
size tool is for. Headings have special uses and you should only use Heading styles for real
headings.
The "preformat" paragraph style is intended to allow you to
import text into HTML and preserve all the text's original line
breaks, paragraphs, indenting, etc., without having to convert the
text into HTML format. SeaMonkey displays "preformat"
paragraphs in the default fixed width font, but this may not be
true for all browsers.
For example, if you type a really, really long line of text while in "preformat" mode, Browsers won't automatically break the text to fit the window until you insert a line break (e.g., by pressing "Enter"). You have to remember to break the line because the browser won't. Do you notice that in your browser?
An alert user will notice the scroll bar on the bottom of the browser window. This is an indication that at least one line on the page is wider than the browser window currently is.
 right side of the window (leaving the left
side ragged), and to center text. The symbols should be familiar to
you from using word processors. Probably the symbol for left
alignment has already been selected. This is the default
setting. You can also click on the other symbols to choose
right side of the window (leaving the left
side ragged), and to center text. The symbols should be familiar to
you from using word processors. Probably the symbol for left
alignment has already been selected. This is the default
setting. You can also click on the other symbols to choose
There's also a button for complete page justification (spaces
in the text will expand to make the text in the paragraph fill
the entire page evenly, so you don't have ragged lines in the
paragraph on either side.
 The two symbols to the
left of the paragraph alignment tool icons will, from left to right,
decrease the indent of some text (arrow points left) or increase the
indent (arrow points right). They work the same as "Format ->
Increase Indent" and "Format -> Decrease Indent" in
the Format Menu.
The two symbols to the
left of the paragraph alignment tool icons will, from left to right,
decrease the indent of some text (arrow points left) or increase the
indent (arrow points right). They work the same as "Format ->
Increase Indent" and "Format -> Decrease Indent" in
the Format Menu. another looks like an italic "I," the third is
an underlined "U". These symbols are how we can make
the text on our web page boldface,
italic or underlined. The same
commands can be found in the Format Menu when you select "Format ->
Text Style".
another looks like an italic "I," the third is
an underlined "U". These symbols are how we can make
the text on our web page boldface,
italic or underlined. The same
commands can be found in the Format Menu when you select "Format ->
Text Style".The icon for each  of these styles changes color when it is active. To
undo these style changes you need to highlight the affected text
and click the icon for the style that you want to undo. The icon
for that style will change back to the normal color, indicating
that it is inactive. Practice changing the same word to different
combinations of boldface, italic, and underline.
of these styles changes color when it is active. To
undo these style changes you need to highlight the affected text
and click the icon for the style that you want to undo. The icon
for that style will change back to the normal color, indicating
that it is inactive. Practice changing the same word to different
combinations of boldface, italic, and underline.
 are two icons that control the text size.
These look like a small "A" and a larger "A",
both with arrows on their right side. The arrow for the smaller "A"
points down, indicating that this will make text smaller, while the
up-pointing arrow on the larger "A" indicates that it makes text
larger. These do the same thing as "Format -> Size -> Smaller"
and "Format
-> Size -> Larger".
are two icons that control the text size.
These look like a small "A" and a larger "A",
both with arrows on their right side. The arrow for the smaller "A"
points down, indicating that this will make text smaller, while the
up-pointing arrow on the larger "A" indicates that it makes text
larger. These do the same thing as "Format -> Size -> Smaller"
and "Format
-> Size -> Larger".Be careful when you change font sizes of text to change the
size of any spaces in the sentence as well, or else your lines of
text may be spaced unevenly even though the visible characters are
all the same size. Try this in your example1.html page by
selecting just the space in between the words "subliminal
advertising" and clicking on the larger "A" with the up arrow
several times. You should notice a large vertical gap
between that line and the line above it because Composer must
allow for the height of the space! But spaces are invisible, so if
you notice a large gap between lines in your text that you can't
explain, a tall space might be the culprit.
 On the far
left of the Format Toolbar is the paragraph format tool. This does
the same thing as "Format -> Paragraph".
On the far
left of the Format Toolbar is the paragraph format tool. This does
the same thing as "Format -> Paragraph".Be sure to save the web page that you make, as we
will use it again in the next lesson, and remember to use the file name "index.html" (or
"index.htm") for your saved file.
| Top of the page | Back to the Course Outline |
Copyright © 2009, 2010, 2012, 2013, 2014, 2016 Mark Heckman. All
rights reserved.